PKM(个人知识管理)构建手册 - Nvim
Aug 02, 2024 · 10635 words · 22 min · #PKM #Nvim
AI摘要正在生成中……
Intro#
在之前的脱离笔记软件,CLI 笔记工具 —nb里,那个时候已经在琢磨使用bash脚本来做笔记的框架。期间因为没有找到有效的处理双链和反链的方法,无意间了解到了Emacs里的org-roam可以提供反链,正好又在学习代码的初期急需一个编辑器,于是在Emacs还是Nvim之间选择了Emacs。
直到这几天无意间发现了vimwiki/vimwiki: Personal Wiki for Vim,如果当初的搜索关键字多了几个字,这几个月关于做笔记的探索将会截然不同。
想脱离笔记软件回归数据本身,这是当初停止使用Logseq、obsidian的最大原因。
我的 Neovim Zettelkasten:我如何使用 Vim 和 Bash 在 Markdown 中做笔记 |米沙·范登伯格 ,随即搜到了这篇文章,让我决定开始尝试Nvim做笔记的方案。Bash其实就是依赖性最小的工具。
org-capture可以用bash脚本来实现,双链通过VImwiki实现,反链同样可以通过bash脚本正则查询实现。在迁移配置到其他环境时Nvim的轻便优势就更大了,在我的Linux虚拟机里迁移一次DoomEmacs将近要安装配置半个多小时,而Nvim一个dotfile,5分钟搞定安装到配置。
Emacs是一个赛博乐高,我很享受这几个月使用Emacs收获的快乐,但它并不能完全扩展成一个兼容性很强的方法。
Emacs也完全是一个操作系统,对比起来Nvim作为编辑器的最大优势就在于轻巧。Org-mode里让我最喜欢的一点就是标题可折叠和自定义显示层级,对各种语言、格式的兼容性都很强。代码块部分可以直接生成结果,可以直接在代码块里使用jupyter,这对于做coding笔记来说很方便。再就是org-capture。它像是一个办公室。这里有书柜、办公桌、台灯,你可以在这里构建任何其他你喜欢的东西,但搬家是个大工程。
这些功能都依赖于Emacs、依赖于org-mode,用的越多,对它们的依赖就越大,因为Emacs和org真的很好用。.org文件转换起来并不麻烦,org基本可以输出成任何其他格式的文件,但迁移之后也就失去了org的功能特性。
这还是背离了我脱离“笔记软件”的初衷。
Notion、Logseq、Obsidian、Roam Research、Heptabase,未来还会有更多的笔记软件,适合自己的才是最好的,选择一个笔记软件、笔记工具就是在选择一个生态、一个系统。你可能会想,既然有这么多成熟的笔记生态了,为什么还要自己折腾这些?因为这些就是他们当初不满意现有的生态,折腾出来的适合自己的笔记方法。我不太想依赖于别人的方法,下一个笔记软件,何必是笔记软件。
通过RAG将PKM和LLM结合起来一定以未来更有效的学习方式。将数据困在.org里绝不是一个很好的方案,结构化的文档有更少的噪声、清晰的数据结构和关系进、支持更复杂的SQL查询,进而从数据源头提高RAG向量化的质量。但好处是,AI可能就不那么好偷学我的笔记了。
从数据层面来思考笔记的形式、回归数据本质是这次要继续探索的方向。PKM笔记文档和PostgreSQL链接起来是下一步要解决的问题。
Nvim更像一支笔,把PKM方法、笔记数据、操作系统链接起来,你可以在任何环境使用这只笔。
这让我感觉更自由。
Vscode?太没个性了。
Manual#
这是一个以 Neovim 为基础编辑器、文件管理的Markdown本地笔记PKM。
本手册包括:
- Prerequisites:开始构建本PKM需要的工具和准备工作
- PKM:本PKM的构建原则和具体方法
- PKM with LLM:PKM和大语言模型结合的使用
总目录在页面最上方:Table of Contents
Prerequisites#
Start with:Git,Neovim,LazyVim,Vimwiki,Bash,kitty 或其他terminal。
开始你可能需要对Nvim,Markdown,Git,vim编辑模式有一些了解,这些可以帮助到你:
- Documentation - Neovim
- 🚀 Getting Started | LazyVim
- Basic Syntax | Markdown Guide
- nvim · GitHub Topics
- LunarVim/Neovim-from-scratch: 📚 A Neovim config designed from scratch to be understandable
- craftzdog/dotfiles-public: My personal dotfiles
- Vim - OI Wiki
- Linux vi/vim | 菜鸟教程
不太建议上手Nvim就直接使用NvChad这种类似于DoomEmacs的集成配置,它们的文件结构不利于自定义个性化配置。Nvim配置起来比Emacs简易许多,不太需要一步到位的集成方案。
LazyVim既是一个插件安装管理器同时也是一个初始的简易Nvim配置,从这里开始。
PKM#
整体的笔记文件管理结构,还是ACCESS,可以选择不用。有文件夹和没有文件夹是两种不同的管理模式,例如ob和Logseq。这个手册里更主要的是分享我在构建PKM的过程中迭代的一些原则和方法,以供参考,形成、巩固自己的方法才是这个手册真正的目的,remember:有形易于无形。具体可以参看:§Vandee的PKM
Journals用来记录每天的日志,作为简单明了的回顾和展开。如果你不喜欢文件夹管理,我觉得这个是很有必要的。
在Nvim里,我暂时使用Bash脚本来创建Journals。以年月日展示,在Typora的侧边栏可以直观的选择特定日期的日志。为了展示MD标题层级的效果,脚本设置了在Typora里默认打开,可以根据需求更改。Nvim里正则搜索特定日期的标题就可以找到当天的日志了。
核心:原子笔记 + 双链。
你可能需要了解「原子笔记」(或者常青笔记,whatever):Evergreen notes should be atomic。
双链和反链让笔记之间的关联更加直观,当原子笔记很多的时候,反链可以直观的反应出和当前笔记相关的其他笔记。它应该同步于思维的链条。
Zettelkasten 其实并不那么重要。
Stay foolish,stay simple。
关于同步:
本地笔记没有在线笔记软件方便的地方就是多端同步与预览。我的本地笔记已经上传到了GitHub仓库,通过Git同步。临时需要修改的直接在GitHub仓库里就修改了。预览方面,我的笔记输出到了Vandee’s Digital Garden。
Principles#
- 一个良好的知识循环系统,应该有优秀的检索逻辑
- 笔记是思维的呈现,它应该是矢量的,当然也是原子化的
- 笔记之间的串联应该完全依靠与思维的同步
- 笔记应该让知识流动起来
- 笔记应该有优秀的层级逻辑
- 笔记的核心价值在于增援未来的自己
无思维不笔记,PKM不做本末倒置的事,让它帮助自己拓展思维,提升思维、学习、认知的效率,找到知识的缝隙,更好的认知世界、认知自我才是本质。
Methods#
在最开始需要构建的关键体系就是检索的逻辑。
在双链部分由于原则上已经和思维高度同步,因此不需要做额外的增加思维成本的检索,只要在记录原子笔记的时候,顺其自然,高度提炼出明确、简洁的一句话概念即可。
在标签tags部分,我习惯把标签当作是一个object的二、三级属性来看待。例如《黄金时代》这本书,它的基础属性是book,我不会再重复标注它,而是写在property里,记下Type: book方便我通过函数来列举所有的书目,tag则记下文学、王小波。我习惯用单数来强调它是个属性,区别与复数的category集合的概念。
我看过许多博客和PKM,许多情况下,他们的tags在语义概念上都混用了,我习惯把tags和categories分开,分类就是分类,标签就是标签。category、property、tag还是需要在逻辑里有自然的分类,理清楚一个概念的内涵与外延。混用会导致tags越来越多,成百上千的tags反而会增加检索的成本,过个几年,大多数的tags你已经忘了当时为什么记下了,单独再去整理标签无疑是个巨大的工程,tags也失去了应当有的作用。tags的构建同样应当同步与自身的思维习惯,自身对概念、语义的记忆。
当然这也完全取决于每个人自己的习惯。
学习、获取信息和知识是在做加法,PKM里更多的应该是减法,Learn and unlearn。
整体配置、配置文件结构参考:craftzdog/dotfiles-public: My personal dotfiles 。
Vimwiki#
Vimwiki提供了类似于org-roam的insert功能,选中文字直接Enter即可在配置的笔记目录下生成笔记。当然也可以/path/notes的形式在相对路径的文件夹里生成对应文件。
VImwiki这个相对路径直接生成文件的实现很重要。在ob里可以直接[[note1]]或[note1](note1)引用note1,但这在其他笔记软件里是不支持的。许多md博客生成框架例如hugo,是不支持这种全局通过文件名引用的。Vimwiki支持[/pkm/note1](note1)这样的格式,保留了相对路径在以后兼容其他框架的时候修改起来就很方便。
然后就可以开始愉快的写md笔记了。反链暂时我使用正则对当前文件名搜索,得到其他引用文件。Lua还不是很熟,后面写一个脚本来打印出搜索的结果。这个在Emacs里可以通过embark在minibuffer里实现。
Lazy安装:
{'vimwiki/vimwiki'}官方文档里,没有直接写明Lazy的安装方式,我还以为不支持,其实是支持的。
配置笔记文件夹
-- vim
let g:vimwiki_list = [{'path': '~/vimwiki/',
                      \ 'syntax': 'markdown', 'ext': 'md'}]

-- lua
vim.g.vimwiki_list = {
  {
    path = '~/vimwiki/',
    syntax = 'markdown',
    ext = 'md'
  }
}
Basic key bindings
<Leader>ww– Open default wiki index file.<Leader>wt– Open default wiki index file in a new tab.<Leader>ws– Select and open wiki index file.<Leader>wd– Delete wiki file you are in.<Leader>wr– Rename wiki file you are in.<Enter>– Follow/Create wiki link.<Shift-Enter>– Split and follow/create wiki link.<Ctrl-Enter>– Vertical split and follow/create wiki link.<Backspace>– Go back to parent(previous) wiki link.<Tab>– Find next wiki link.<Shift-Tab>– Find previous wiki link.
Bash - MD capture#
我现在自用的bash脚本包括导航脚本和特定笔记脚本两种,根据这两个模板常用的笔记需求基本可以满足。基本复现org-capture里自定义模板、特定位置写入内容、指定文件生成位置。
使用Bash脚本步骤#
添加脚本文件夹环境全局访问:
.bash_profileor.bashrc文件里写入export PATH="~/path/my_scripts:$PATH"添加脚本可执行权限:terminal里
cd ~/path/my_scripts到脚本文件夹位置,chmod +x script_name.sh添加别名:
alias script_alias='path/my_scripts/script_name.sh',然后source ~/.bash_profileorsource ~/.bashrcNvim里打开terminal或直接打开系统terminal,输入脚本名字或别名。
如果使用的是Homebrew安装的Bash,在脚本里替换
#!/bin/bash为#!/opt/homebrew/bin/bash
脚本模板参考#
导航脚本,选择创建笔记的类型:
#!/bin/bash

# 设置退出脚本的陷阱
trap 'echo "退出脚本。"; exit' SIGINT

# 定义脚本目录
script_dir="$HOME/path/"

# 定义操作和对应的脚本
declare -A operations=(
  [1]="Journals.sh"
  [2]="NotesMD.sh"
  [3]="AtomicMD.sh"
  [4]="BlogMD.sh"
)

# 显示操作选择列表并提示用户输入
echo "请选择要执行的操作(输入序号):"
for i in $(seq 1 ${#operations[@]}); do
  echo "$i. ${operations[$i]}"
done
echo "或者输入 'q' 退出脚本"

# 读取用户输入
read -p "输入序号: " choice

# 检查用户是否选择退出脚本
if [[ "$choice" == "q" ]]; then
  echo "退出脚本。"
  exit
fi

# 根据用户输入的序号执行相应的脚本
if [[ -n "${operations[$choice]}" ]]; then
  script_path="${script_dir}${operations[$choice]}"
  echo "执行 ${operations[$choice]} 脚本..."
  # 执行相应的脚本
  "$script_path"
else
  echo "无效的序号,请输入1到4之间的数字。"
  exit 1
fi

# 提醒用户已执行相应脚本
echo "已执行选择的脚本。"
Journal脚本,生成每天的日志:
#!/bin/bash

# 设置系统语言环境为英文
export LC_ALL=en_US.UTF-8
export LANG=en_US.UTF-8

# 设置绝对路径
base_path="$HOME/path/Journals"

# 获取当前年份
current_year=$(date +"%Y")

# 询问用户输入日期
read -p "Please enter the date (YYYY-MM-DD or MM-DD) [default: $(date +"%Y-%m-%d")], or 'q' to quit: " input_date

# 如果用户输入 'q',则退出脚本
if [ "$input_date" == "q" ]; then
    echo "Exiting the script."
    exit 0
fi

# 如果用户没有输入日期,则使用当天日期
if [ -z "$input_date" ]; then
    input_date=$(date +"%Y-%m-%d")
fi

# 检查输入格式
if [[ $input_date =~ ^([0-9]{4})-([0-9]{2})-([0-9]{2})$ ]]; then
    # 完整的 YYYY-MM-DD 格式
    input_year=$(echo "$input_date" | cut -d'-' -f1)
    input_month=$(echo "$input_date" | cut -d'-' -f2)
    input_day=$(echo "$input_date" | cut -d'-' -f3)
elif [[ $input_date =~ ^([0-9]{2})-([0-9]{2})$ ]]; then
    # MM-DD 格式,使用当前年份
    input_year=$current_year
    input_month=$(echo "$input_date" | cut -d'-' -f1)
    input_day=$(echo "$input_date" | cut -d'-' -f2)
else
    echo "Invalid date format. Please use YYYY-MM-DD or MM-DD."
    exit 1
fi

# 生成 Journal 文件路径
journal_filename="Journal-$input_year.md"
journal_path="$base_path/$journal_filename"

# 检查文件是否已存在
if [ -f "$journal_path" ]; then
    echo "Journal file already exists: $journal_path"
    target_file="$journal_path"
else
    touch "$journal_path"
    echo "Journal file created: $journal_path"
    target_file="$journal_path"
fi

# 获取当前日期信息
current_date=$(date +"%Y-%m-%d")
current_month_name=$(date +"%b")
current_day_name=$(date +"%A")

# 使用 date 命令获取输入日期的月份和星期几的名称
input_month_name=$(date -j -f "%Y-%m-%d" "$input_year-$input_month-$input_day" +"%b")
input_day_name=$(date -j -f "%Y-%m-%d" "$input_year-$input_month-$input_day" +"%A")

# 检查当前年份头是否存在
if ! grep -q "# $input_year" "$target_file"; then
    echo "# $input_year" >> "$target_file"
    echo "Current year header inserted in $target_file: # $input_year"
else
    echo "Current year header already exists, no need to insert it again"
fi

# 检查当前月份头是否存在
if ! grep -q "## $input_year-$input_month $input_month_name" "$target_file"; then
    echo "## $input_year-$input_month $input_month_name" >> "$target_file"
    echo "Current month header inserted in $target_file: ## $input_year-$input_month $input_month_name"
else
    echo "Current month header already exists, no need to insert it again"
fi

# 检查当前日期头是否存在
if ! grep -q "### $input_year-$input_month-$input_day $input_day_name" "$target_file"; then
    echo "### $input_year-$input_month-$input_day $input_day_name" >> "$target_file"
    echo "Current day of the week header inserted in $target_file: ### $input_year-$input_month-$input_day $input_day_name"
    echo "" >> "$target_file"
    echo "- TODOs" >> "$target_file"
    echo "- Inbox" >> "$target_file"
    # 将光标定位在"- Inbox"这一行
    sed -i '' -e '/- Inbox/G' "$target_file"
else
    echo "Current day of the week header already exists"
fi

# 用Typora打开生成的日记文件
open -a Typora "$target_file"
Notes脚本,生成一般的笔记:
#!/bin/bash

# 提示用户输入Markdown文件的名称,并检查是否输入了"q"以退出脚本
while true; do
  read -p "请输入Markdown文件的名称(不包含.md扩展名)或输入'q'退出: " filename
  if [[ "$filename" == "q" ]]; then
    echo "退出脚本。"
    exit
  fi
  # 如果用户没有输入任何内容,则使用当前日期和时间作为文件名
  filename=${filename:-$(date '+%Y%m%d%H%M%S')}
  # 检查输入是否有效,如果为空则继续询问
  if [ -z "$filename" ]; then
    echo "文件名不能为空,请输入文件名或输入'q'退出。"
    continue
  fi
  # 一旦获得有效输入,跳出循环
  break
done

# 检查是否已经存在该目录,如果不存在则创建
mdNotesDir="$HOME/path/"
if [ ! -d "$mdNotesDir" ]; then
  mkdir -p "$mdNotesDir"
fi

# 构建完整的文件路径
fullPath="${mdNotesDir}${filename}.md"

# 获取当前的日期和时间
current_date=$(date '+%Y-%m-%d')
current_date_yyyyMMddHHmmss=$(date '+%Y%m%d%H%M%S')

# 创建并写入 YAML 头信息到 Markdown 文件
cat > "$fullPath" <<EOF
---
UID: $current_date_yyyyMMddHHmmss
title: $filename
alias:
areas:
tags:
rank:
source:
type: Article
date: $current_date
---
EOF

# 提醒用户文件已创建
echo "Markdown 文件 '$fullPath' 已创建。"

# 使用 open 命令自动打开文件
open -a "typora" "$fullPath"
ToggleTerm#
akinsho/toggleterm.nvim 可以在Nvim里快速创建一个内置终端。结合Bash脚本,体验和Emacs里使用org-capture差不多。当然,org-capture可以结合org-protocol,还是要强大太多。
安装
{
  -- amongst your other plugins
  {'akinsho/toggleterm.nvim', version = "*", config = true}
  -- or
  {'akinsho/toggleterm.nvim', version = "*", opts = {--[[ things you want to change go here]]}}
}
参考配置
local toggleterm = require("toggleterm")

toggleterm.setup({
    size = 15, - 设置窗口大小
    open_mapping = "<C-\\>",
    start_in_insert = true,
    direction = "horizontal", - 设置窗口横向或竖向
    shell = vim.o.shell, - 设置需要使用的shell
})

- 在Terminal里使用vim的移动指令
function _G.set_terminal_keymaps()
  local opts = { noremap = true }
  vim.api.nvim_buf_set_keymap(0, 't', '<esc>', [[<C-\><C-n>]], opts)
  vim.api.nvim_buf_set_keymap(0, 't', 'jk', [[<C-\><C-n>]], opts)
  vim.api.nvim_buf_set_keymap(0, 't', '<C-h>', [[<C-\><C-n><C-W>h]], opts)
  vim.api.nvim_buf_set_keymap(0, 't', '<C-j>', [[<C-\><C-n><C-W>j]], opts)
  vim.api.nvim_buf_set_keymap(0, 't', '<C-k>', [[<C-\><C-n><C-W>k]], opts)
  vim.api.nvim_buf_set_keymap(0, 't', '<C-l>', [[<C-\><C-n><C-W>l]], opts)
end

vim.cmd('autocmd! TermOpen term://* lua set_terminal_keymaps()')

local Terminal = require("toggleterm.terminal").Terminal
local lazygit = Terminal:new({ cmd = "lazygit", hidden = true })

function _LAZYGIT_TOGGLE()
  lazygit:toggle()
end

local node = Terminal:new({ cmd = "node", hidden = true })

function _NODE_TOGGLE()
  node:toggle()
end

local python = Terminal:new({ cmd = "python3", hidden = true })

function _PYTHON_TOGGLE()
  python:toggle()
end

-- 为 Python 终端设置快捷键
vim.api.nvim_set_keymap('n', '<leader>tp', ':lua _PYTHON_TOGGLE()<CR>', { noremap = true, silent = true })
-- 快速打开Terminal
vim.keymap.set("n", "<Leader>tt", function()
  require("toggleterm").toggle()
end, { desc = "ToggleTerm" })

-- end
中英输入法问题#
im-select-nvim#
keaising/im-select.nvim 这个插件可以在Nvim里让nomal模式下自动切换成英文输入,在insert模式下自动切换回中文输入。刚需。
先安装im-select
Install

Please install im-select

Download URL: https://github.com/daipeihust/im-select

Check installation in bash/zsh

# find binary
$ which im-select

# Get current im name
$ im-select

# Try to switch to English keyboard
$ im-select com.apple.keylayout.ABC

Check in NeoVim

:!which im-select
im-select-nvim的安装和配置
{
    "keaising/im-select.nvim",
    config = function()
        require('im_select').setup({
            -- IM will be set to `default_im_select` in `normal` mode
            -- For Windows/WSL, default: "1033", aka: English US Keyboard
            -- For macOS, default: "com.apple.keylayout.ABC", aka: US
            -- For Linux, default:
            --               "keyboard-us" for Fcitx5
            --               "1" for Fcitx
            --               "xkb:us::eng" for ibus
            -- You can use `im-select` or `fcitx5-remote -n` to get the IM's name
            default_im_select  = "com.apple.keylayout.ABC",

            -- Can be binary's name, binary's full path, or a table, e.g. 'im-select',
            -- '/usr/local/bin/im-select' for binary without extra arguments,
            -- or { "AIMSwitcher.exe", "--imm" } for binary need extra arguments to work.
            -- For Windows/WSL, default: "im-select.exe"
            -- For macOS, default: "im-select"
            -- For Linux, default: "fcitx5-remote" or "fcitx-remote" or "ibus"
            default_command = "/opt/homebrew/bin/im-select",

            -- Restore the default input method state when the following events are triggered
            set_default_events = { "VimEnter", "FocusGained", "InsertLeave", "CmdlineLeave" },

            -- Restore the previous used input method state when the following events
            -- are triggered, if you don't want to restore previous used im in Insert mode,
            -- e.g. deprecated `disable_auto_restore = 1`, just let it empty
            -- as `set_previous_events = {}`
            set_previous_events = { "InsertEnter" },

            -- Show notification about how to install executable binary when binary missed
            keep_quiet_on_no_binary = false,

            -- Async run `default_command` to switch IM or not
            async_switch_im = true
        })
    end,
},
Ref:
- 完善 Rime Vim Mode:支持 Linux & 自动切换回中文模式 · Issue #85 · lei4519/blog
- Vim 的中文支持及解决思路 - 少数派
- 如何让 Neovim 中文输入时自动切换输入法 · Blowfish
RIME#
如果说PKM是纸,那么输入法就是笔。
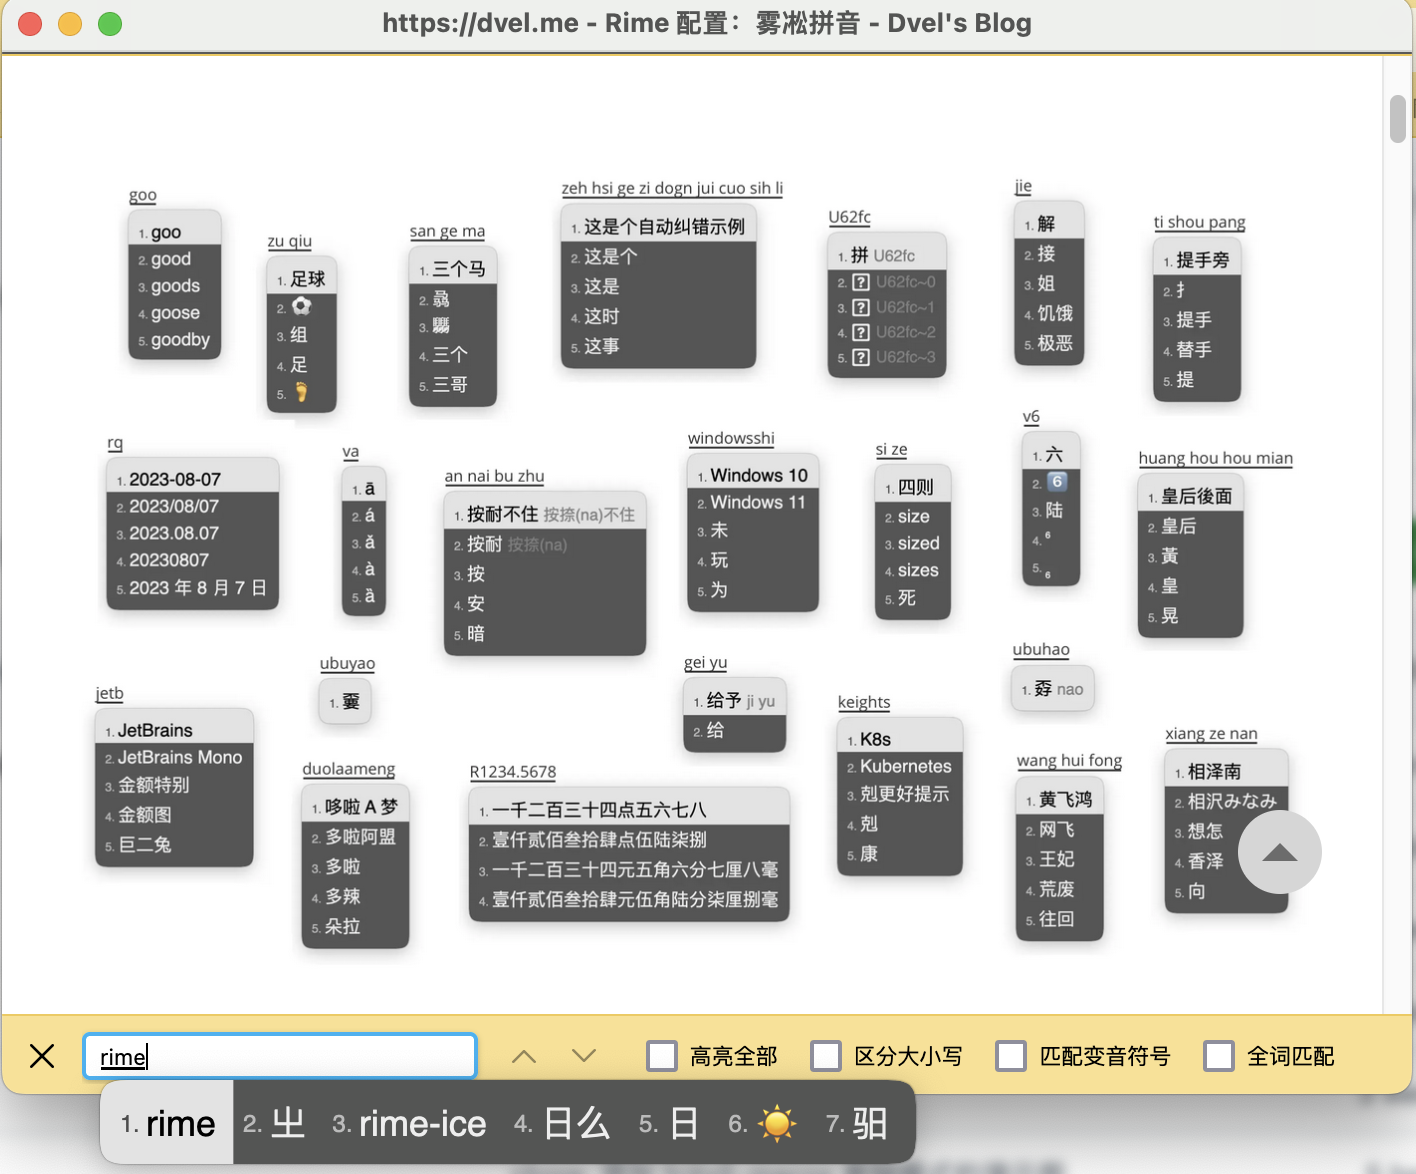
再次强烈推荐 RIME | 中州韻輸入法引擎,配合 iDvel/rime-ice: Rime 配置:雾凇拼音 | 长期维护的简体词库,多平台多端同步。已经使用了几年,非常巴适,手机端也可以同步配置。
以前输入法就各种偷偷记录用户输入习惯,现在各个输入法又还要内置AI再记录一遍。本地配置、不需要联网的输入法是我的刚需,更何况,rime还可以自挂词库。
一个巨坑,最近的RIME更新在Release 1.0.0 · rime/squirrel版本里改变了候选词横向和竖向的设置:
style/horizontal 將徹底移除,雖然本版程序仍支持,但會被新控件的默認值覆蓋
請使用 candidate_list_layout: stacked/linear 和 text_orientation: horizontal/vertical
而且最好直接在输入法外观的配置文件里,修改输入法外观的配置,而不是通用配置,反正我在通用设置里不起作用。
下面是简单的安装步骤:
;; mac:
;; mac rime: https://rime.im/download/
Homebrew: brew install --cask squirrel
或者直接下载
;; mac rime-ice
使用东风破 plum 安装: https://github.com/rime/plum
curl -fsSL https://raw.githubusercontent.com/rime/plum/master/rime-install | bash

安装 rime-ice:
℞ 安装或更新全部文件
bash rime-install iDvel/rime-ice:others/recipes/full

℞ 安装或更新所有词库文件(包含下面三个)
bash rime-install iDvel/rime-ice:others/recipes/all_dicts

℞ 安装或更新拼音词库文件( cn_dicts/ 目录内所有文件)
bash rime-install iDvel/rime-ice:others/recipes/cn_dicts

℞ 安装或更新英文词库文件( en_dicts/ 目录内所有文件)
bash rime-install iDvel/rime-ice:others/recipes/en_dicts

℞ 安装或更新 opencc ( opencc/ 目录内所有文件)
bash rime-install iDvel/rime-ice:others/recipes/opencc

;;或使用 rime-auto-deploy:https://github.com/Mark24Code/rime-auto-deploy,这个和plum只用选一个。

=======================================================
;;Linux
ibus:
https://github.com/rime/home/wiki/RimeWithIBus
sudo apt-get install ibus-rime                   #ibus

fcitx5:
sudo pacman -Sy fcitx5-rime                      # Arch Linux
sudo apt update && sudo apt install fcitx5-rime  # Ubuntu / Debian / Deepin
sudo zypper install fcitx5-rime                  # OpenSUSE
sudo dnf install fcitx5-rime                     # Fedora

plum and rime-ice:
git clone --depth 1 https://github.com/rime/plum ~/plum

# 切换到东风破的目录
cd ~/plum

# 如果你使用Fcitx5,你需要加入参数,让东风破把配置文件写到正确的位置
rime_frontend=fcitx5-rime bash rime-install iDvel/rime-ice:others/recipes/full

# 如果你是用IBus,则不需加参数,因为东风破默认是为IBus版的RIME打造。
bash rime-install iDvel/rime-ice:others/recipes/full
其他可以参考下面的文章:
MarkdownPreview#
iamcco/markdown-preview.nvim提供实时的markdown预览,对于经常写md的不是那么必须,拿不准的可以预览看看的整体效果。输入:MarkdownPreview就会在浏览器里打开预览。
当然,还有个更简单的办法,在Typora里打开:
-- 定义一个函数,用于在 Typora 中打开当前缓冲区文件 --
local function open_with_typora()
    local current_file = vim.api.nvim_buf_get_name(0)
    vim.cmd('!open -a Typora "' .. current_file .. '"')
end

-- 将该函数绑定到 <leader>t 快捷键
vim.keymap.set('n', '<leader>fo', open_with_typora, { desc = 'Open current buffer in Typora' })

-- end
安装
在Nvim里使用Lazy安装会报错,这个 issue 给出了解决办法:
  {
    -- Install markdown preview, use npx if available.
    "iamcco/markdown-preview.nvim",
    cmd = { "MarkdownPreviewToggle", "MarkdownPreview", "MarkdownPreviewStop" },
    ft = { "markdown" },
    build = function(plugin)
      if vim.fn.executable "npx" then
        vim.cmd("!cd " .. plugin.dir .. " && cd app && npx --yes yarn install")
      else
        vim.cmd [[Lazy load markdown-preview.nvim]]
        vim.fn["mkdp#util#install"]()
      end
    end,
    init = function()
      if vim.fn.executable "npx" then vim.g.mkdp_filetypes = { "markdown" } end
    end,
  },
配置
其他的基本不用怎么配置,下面是指定浏览器的配置:
Add the following to your Neovim init script:

Linux

  function OpenMarkdownPreview (url)
    execute "silent ! firefox --new-window " . a:url
  endfunction
  let g:mkdp_browserfunc = 'OpenMarkdownPreview'

Replace firefox with chrome if you prefer. Both browsers recognize the --new-window option.

macOS

  function OpenMarkdownPreview (url)
    execute "silent ! open -a Firefox -n --args --new-window " . a:url
  endfunction
  let g:mkdp_browserfunc = 'OpenMarkdownPreview'

Replace Firefox with Google\ Chrome or Brave\ Browser if you prefer. They all recognize the --new-window option.
Image render#
3rd/image.nvim这个插件可以让Nvim以的md语法显示本地图片和remote图片。插件推荐使用kitty终端,刚好我也用的kitty。
依赖
Mandatory Deps:
安装
{
    "vhyrro/luarocks.nvim",
    priority = 1001, -- this plugin needs to run before anything else
    opts = {
        rocks = { "magick" },
    },
},
{
    "3rd/image.nvim",
    dependencies = { "luarocks.nvim" },
    config = function()
        -- ...
    end
}
配置
require('image').setup({ integrations = { markdown = { resolve_image_path = function(document_path, image_path, fallback) -- document_path is the path to the file that contains the image -- image_path is the potentially relative path to the image. for -- markdown it's `` -- you can call the fallback function to get the default behavior return fallback(document_path, image_path) end, } } })
网页摘录和after-reading#
有一个JavaScript我一直在用,可以选定一个网页的特定内容,在翻译和剪藏的时候挺有用,同时也微微提升了一点阅读体验。我用 DeepLX 通过沉浸式翻译如果单次翻译内容太多会报错和限制,Deepl的中文翻译还是吊打其他的。
下面的代码保存到书签,单击书签就可以了:
javascript:(function(){var e=document.body;const n=document.head.appendChild(document.createElement("style"));n.textContent=".mainonly { outline: 2px solid red; }";const t=CSS.supports("selector(:has(*))");function o(n){n instanceof HTMLElement&&(e.classList.remove("mainonly"),(e=n).classList.add("mainonly"))}function s(e){o(e.target)}function a(o){if(o.preventDefault(),t)n.textContent=":not(:has(.mainonly), .mainonly, .mainonly *) { display: none; }";else{n.textContent=":not(.mainonly *, .mainonly-ancestor) { display: none; }";var s=e;do{s.classList.add("mainonly-ancestor")}while(s=s.parentElement)}l()}function i(n){n.preventDefault(),n.deltaY<0?o(e.parentElement):o(e.firstElementChild)}function l(){document.removeEventListener("mouseover",s),document.removeEventListener("click",a),document.removeEventListener("wheel",i)}document.addEventListener("mouseover",s),document.addEventListener("click",a),document.addEventListener("wheel",i,{passive:!1}),document.addEventListener("keydown",(function o(s){if("Escape"===s.key&&(n.remove(),document.removeEventListener("keydown",o),l(),e?.classList.remove("mainonly"),!t))for(const e of document.getElementsByClassName("mainonly-ancestor"))e.classList.remove("mainonly-ancestor")}))}())
Omnivore,开源免费,支持RSS和Newsletter,可以自动同步高亮标注、摘录到Obsidian和Logseq。这部分用来做 流动知识的检索,文档+RAG现在的项目也越来越多了。用AI来过滤、总结这些信息流很巴适。
简单写了一个python用来直接获取高亮摘录并与本地LLM问答:RSS 订阅和本地 LLM 结合的初步尝试 - 流动知识检索 | Vandee’s Blog。
欢迎来到 n8n 中文教程 | 简单易懂的现代魔法这里给出了一个 omnivore 到 notion 的 workflow。
Tools#
Github:https://github.com/jina-ai/reader
它可以提取网页内容并转换为markdown格式,还支持直接搜索,支持API。
Reader does two things:
- Read: It converts any URL to an LLM-friendly input with
https://r.jina.ai/https://your.url. Get improved output for your agent and RAG systems at no cost. - Search: It searches the web for a given query with
https://s.jina.ai/your+query. This allows your LLMs to access the latest world knowledge from the web.
添加下面代码到书签保存,点击书签就可以提取网页内容到markdown格式了。
javascript: var currentUrl = window.location.href;var newUrl = "https://r.jina.ai/" + currentUrl;window.open(newUrl, '_blank');window.history.pushState({}, '', currentUrl);以这个工具为跳板,就可以干许多有意思的事情了。例如在Cloudflare的workers里通过它的url请求来同时获取多个网页的md文档内容,再白嫖Cloudflare的AI整理、分类、总结文档,存入Cloudflare的KV或D1。
进阶版: md.dhr.wtf/
- Read: It converts any URL to an LLM-friendly input with
Markdownload,一个提取网页内容到md格式文档的浏览器插件。推荐沉浸式翻译作者修改的版本markdownload。
JimmyLv/BibiGPT-v1 这个项目可以自己部署,总结B站、YouTube、抖音等等的视频内容,挺好用。
u-Sir/drag-to-preview,最近发现一个Firefox浏览器插件,可以选中网页链接拖拽弹出单独的窗口预览网页,在窗口外区域鼠标点击即可关闭,很符合我的胃口。
PKM with LLM#
本地笔记的优势除了隐私性,再就是,数据在自己手上,就可以干很多事。把本地的笔记文档结合LLM做思维拓展,基于个人思维习惯更精确的问答。如果说有时候双链不足以串联整个思维链条,下面这些工具如虎添翼。
看到一个大佬已经用Ollama、RAG在MacBook Pro M3 Max上实现了基于obsidian的个人AI知识助手:个人本地 (Llama3 8B) LLM 使用 WhatsApp + Obsidian 数据扩展 - Byte Tank,和我的思路基本一致。
简单写了一个python用来直接获取高亮摘录并与本地LLM问答:RSS 订阅和本地 LLM 结合的初步尝试 - 流动知识检索 | Vandee’s Blog
工具推荐#
Ollama#
Ollama 可以本地部署大语言模型,目前GitHub 69.1k star,一直在用。obsidian,Emacs,Logseq都支持。如果说Cloudflare是赛博活菩萨,那ollama就是LLM筋斗云。
$ ollama serve 即可后台启动ollama服务。
docker 部署:
# Docker Pull Command

docker pull ollama/ollama

# CPU only

docker run -d -v ollama:/root/.ollama -p 11434:11434 --name ollama ollama/ollama

# AMD GPU
# To run Ollama using Docker with AMD GPUs, use the rocm tag and the following command:

docker run -d --device /dev/kfd --device /dev/dri -v ollama:/root/.ollama -p 11434:11434 --name ollama ollama/ollama:rocm

# Run model locally
# Now you can run a model:

docker exec -it ollama ollama run llama3

# 有时候 Docker 容器无法访问 Ollama 服务。localhost 通常指的是容器本身,而不是主机或其他容器。要解决此问题,需要将 Ollama 服务暴露给网络。

# 在Mac上设置环境变量

# 如果 Ollama 作为 macOS 应用程序运行,则应使用以下命令设置环境变量launchctl:
# 通过调用launchctl setenv设置环境变量:

launchctl setenv OLLAMA_HOST "0.0.0.0"

# 重启Ollama应用程序。
# 如果以上步骤无效,可以使用以下方法:
# 问题是在docker内部,你应该连接到host.docker.internal,才能访问docker的主机,所以将localhost替换为host.docker.internal服务就可以生效了:

http://host.docker.internal:11434
ollama支持主流的开源模型如llama3,所有支持模型可查看:
Model library:Ollama supports a list of models available on ollama.com/library
相关文章:
Open WebUI#
Open WebUI 提供一个WebUI运行本地LLM,目前GitHub 31k star。良好的兼容ollama,聊天数据本地保存,可本地导入文档做RAG查询。
社区提供了插件和功能,质变的是:可以让本地LLM搜索web的内容。
其他主要功能:
📚 本地 RAG 集成:通过突破性的检索增强生成 (RAG) 支持深入探索聊天交互的未来。此功能将文档交互无缝集成到您的聊天体验中。您可以将文档直接加载到聊天中或将文件添加到文档库中,在查询之前使用
#命令轻松访问它们。🔍 RAG 的网络搜索:使用
SearXNG、Google PSE、Brave Search、serpstack、serper、Serply、DuckDuckGo和TavilySearch并将结果直接注入您的聊天体验中。🌐 网页浏览功能:使用
#命令后跟 URL,将网站无缝集成到您的聊天体验中。此功能允许您将网络内容直接合并到您的对话中,从而增强交互的丰富性和深度。
docker部署相当简单:
CLI:
docker run -d -p 3000:8080 --add-host=host.docker.internal:host-gateway -v open-webui:/app/backend/data --name open-webui --restart always ghcr.io/open-webui/open-webui:mainDocker compose: https://github.com/open-webui/open-webui/blob/main/docker-compose.yaml
services: ollama: volumes: - ollama:/root/.ollama container_name: ollama pull_policy: always tty: true restart: unless-stopped image: ollama/ollama:${OLLAMA_DOCKER_TAG-latest} open-webui: build: context: . args: OLLAMA_BASE_URL: '/ollama' dockerfile: Dockerfile image: ghcr.io/open-webui/open-webui:${WEBUI_DOCKER_TAG-main} container_name: open-webui volumes: - open-webui:/app/backend/data depends_on: - ollama ports: - ${OPEN_WEBUI_PORT-3000}:8080 environment: - 'OLLAMA_BASE_URL=http://ollama:11434' - 'WEBUI_SECRET_KEY=' extra_hosts: - host.docker.internal:host-gateway restart: unless-stopped volumes: ollama: {} open-webui: {}# Manual Update 手动更新 # Pull the Latest Docker Image: 拉取最新的 Docker 镜像: docker pull ghcr.io/open-webui/open-webui:main # Stop and Remove the Existing Container: 停止并删除现有容器: This step ensures that you can create a new container from the updated image. 此步骤确保您可以从更新的映像创建新容器。 docker stop open-webui docker rm open-webui # Create a New Container with the Updated Image: 使用更新后的映像创建一个新容器: Use the same docker run command you used initially to create the container, ensuring all your configurations remain the same. 使用最初用于创建容器的相同 docker run 命令,确保所有配置保持不变。 docker run -d -p 3000:8080 --add-host=host.docker.internal:host-gateway -v open-webui:/app/backend/data --name open-webui --restart always ghcr.io/open-webui/open-webui:main This process updates your Open WebUI container to the latest version while preserving your data stored in Docker volumes. 此过程将您的 Open WebUI 容器更新到最新版本,同时保留存储在 Docker 卷中的数据。
Ref:Open WebUI 官方手册
Dify#
Dify是一个支持本地部署的,兼容多方LLM平台(当然也支持ollama的本地模型)的,LLM-agent构建系统,约等于开源的扣子,目前GitHub 38.2K star。把本地的笔记加入到知识库,再用模板构建一个问答机器人助手,就可以简单的把本地笔记和LLM链接起来了。当然它可以做的太多了,爬取rss订阅、爬取新闻分类摘要,还在研究。
bestblogs.dev 就是一个很好的Dify案例: BestBlogs.dev 基于 Dify Workflow 的文章智能分析实践
官方简介:
你或许可以把 LangChain 这类的开发库(Library)想象为有着锤子、钉子的工具箱。与之相比,Dify 提供了更接近生产需要的完整方案,Dify 好比是一套脚手架,并且经过了精良的工程设计和软件测试。
重要的是,Dify 是开源的,它由一个专业的全职团队和社区共同打造。你可以基于任何模型自部署类似 Assistants API 和 GPTs 的能力,在灵活和安全的基础上,同时保持对数据的完全控制。
我们的社区用户对 Dify 的产品评价可以归结为简单、克制、迭代迅速。
——路宇,Dify.AI CEO
docker部署
克隆 Dify 源代码至本地。
git clone https://github.com/langgenius/dify.git进入 Dify 源代码的 docker 目录,执行一键启动命令:
cd dify/docker
cp .env.example .env
docker compose up -d
Ref:
Kotaemon#
从发现到现在差不多就一个多星期,GitHub直接飙升到10.9K star,win、mac、Linux都支持。边用边学习它的RAG构建框架,支持ollama,支持docker。
GitHub: https://github.com/Cinnamon/kotaemon
官方介绍:
This project serves as a functional RAG UI for both end users who want to do QA on their documents and developers who want to build their own RAG pipeline.
- For end users:
- A clean & minimalistic UI for RAG-based QA.
- Supports LLM API providers (OpenAI, AzureOpenAI, Cohere, etc) and local LLMs (via
ollamaandllama-cpp-python). - Easy installation scripts.
- For developers:
- A framework for building your own RAG-based document QA pipeline.
- Customize and see your RAG pipeline in action with the provided UI (built with Gradio).
- If you use Gradio for development, check out our theme here: kotaemon-gradio-theme.
Thanks#
这个手册会持续更新,如果对你有所帮助,我会很开心。
这里是我日常使用的实用小工具: 实用小玩意收集
Imagining and creating!